[ad_1]
You’ve heard they’re great to have, but which Canon 100-400 stabilizer modes should be used in what situations. This guide will give you a simple understanding of how to choose the best image stabilization mode on your 100-400mm IS II lens.
It was a little confusing for me when I first got my Canon 70-200mm f/2.8 because it has 2 stabilizer modes. Well, now we have 3 stabilizer modes to pick from with the mark II version of the Canon 100-400 lens. This guide will help you get rid of the confusion .
image stabilization mode 3
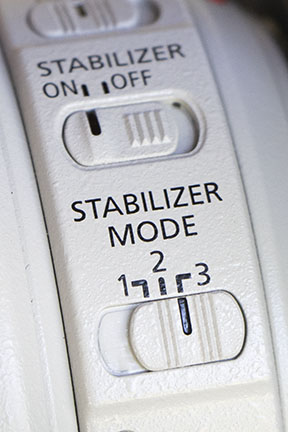 IS Mode 3
I give the lens designers over at Canon some credit for this specific mode of image stabilization. Not my favorite, but you’ll find it very useful if you’re shooting irregularly moving subjects.
This is likely the most underutilized image stabilization mode used with the Canon 100-400 IS II because it’s the least understood. I look forward to testing it thoroughly once the Covid19 pandemic allows it.
Mode 3 on the Canon IS II is a specialized I.S. mode that only engages when the shutter button is pressed fully down and the exposure is made. This gives you an unaffected view of your moving subject in real time without any smoothing effect.
Some photographers may prefer this as a better way to track their subject as they compose their photo. It’s really a matter of personal preference.
WHEN TO USE IS MODE 3
The quickest example that comes to mind is the photography of small birds in flight. Unlike their larger counterparts like the eagle or the heron, small birds often move in more random directions.
A second example is when you’re photographing a quickly irregularly moving participant during a sporting event. Athletes in team sports like soccer or basketball often change direction quickly.
Some Canon shooters find the stabilization effect during tracking to be annoying and only want the actual image taken to be stabilized, not the time before exposure.
image stabilization mode 2
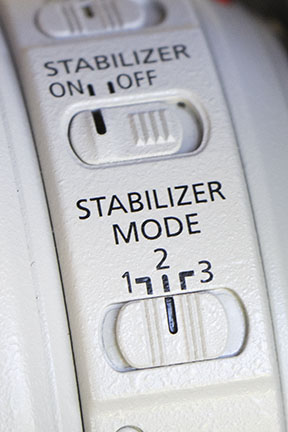 IS Mode 2
Set your Canon 100-400mm II lens on image stabilization mode 2 when you are tracking the movement of a subject that is moving in a specific constant direction.
It’s called panning when you move your camera to follow the subject as you make the exposure.
This is an effective to create the feeling of motion by making the background blurry but keeping the main subject relatively sharp.
Sometimes it takes a bit of experimenting with shutter speeds to get just the right effect you’re looking for. Here’a post I wrote on my other photography website that will help you understand shutter speed.
WHEN TO USE IS MODE 2
Anytime your subject is moving continuously in the same direction and you can’t or don’t want to use a super fast shutter speed to freeze all motion is a good time for image stabilization mode 2.
.
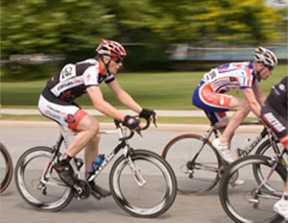 Use I.S. Mode 2
A classic example of this is when you’re photographing a race.
Whether it’s a bike race, a running race, a motor sport race, or a sailboat race, you can use mode 2 of the image stabilization to reduce your lens movement in the perpendicular plane.
If you’re panning along the horizon, IS mode 2 will reduce blur from vertical camera movement.
If you’re panning upward or downward, mode 2 will reduce the movement from side to side.
image stabilization mode 1
 IS Mode 1
Mode one corrects for lens vibrations in all directions. This is the one image stabilization mode you’ll find yourself using on your Canon 100-400 IS II lens more than any other.
Particularly at a fully zoomed in to 400mm focal length, where any movements are magnified the most, IS mode 1 dramatically improves the sharpness of your image at slower shutter speeds. You’ll want to use it for any subject that isn’t moving, like the American bald eagle photo at the beginning of this article.
Although I have no statistical evidence to back this up, I’d venture to say that mode 1 of the 100-400 image stabilization is the one chosen by photographers to use 95% of the time.
This lens is rated at 4 f/stops of stabilization and many Canon shooters will support that claim. Look for a future test on that topic on this website.
You activate this feature by sliding the IS on/off switch to the on position and pressing the shutter release button halfway. Unlike mode 3, once mode 1 is activated, the view through the lens is being “vibration reduced” continuously as you watch your subject and when you actually take the photo.
WHEN TO USE IS MODE 1
Whenever your shutter speed is slow. The rule of thumb is to use it anytime your shutter speed is slower than the reciprocal of the focal length you’re shooting with.
Here’s an example. If you’re photographing a stationary bird with your lens zoomed to 400mm then shooting at 1/400 second or faster would make sense to use your image stabilization. That’s if you have a very steady hand. I prefer to to go an addition full step to 1/800 second before I’m certain to get a sharp photo.
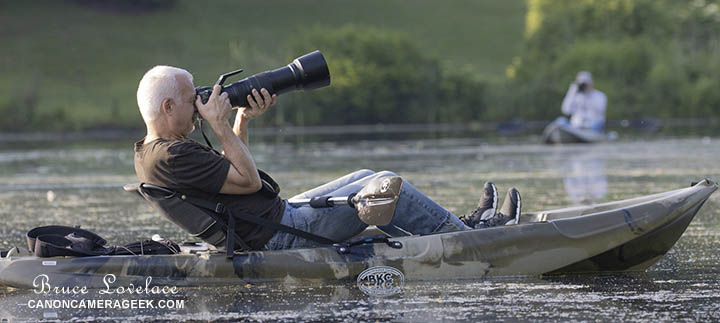 Photo of kayak photographers taken from another kayak.
Image Stabilization Mode 1
Another situation where IS mode 1 should be used is when you’ve got yourself into an unbalanced, unstable or moving position when you’re about to shoot your photo. See the kayak photo above.
Use IS mode 1 when you can’t use flash indoors. Examples of this are inside a movie theater, an aquarium, or a museum.
As an Amazon affiliate Canon Camera Geek receives a small commission from qualifying purchases, at NO added cost to you.
when to turn image stabilization off
Do not use your image stabilization on your Canon lens when you have it mounted to a tripod. Using a tripod along with image stabilization can often create photos that are less sharp.
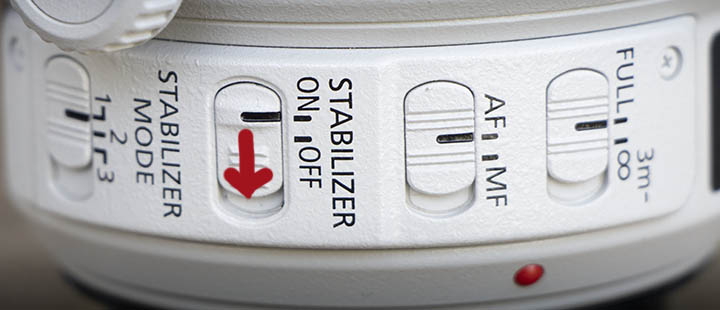 I.S. should be off when using a tripod
Secondly, make sure you image stabilization is off if you’re using “bulb” mode. That can cause errors. Also, do not remove your Canon 100-400 lens from your camera while the IS is engaged. That can cause a malfunction, according to the Canon 100-400 IS II Users Guide.
You can save battery power if you switch your image stabilization off. It’s a bigger drain on the camera battery if your camera is constantly making those micro adjustments of the internal lens elements.
I hope you found this article useful. You can search for other helpful articles on this website by using the search box below.
Search for articles on this Site:


Bruce Lovelace is the publisher of Canon Camera Geek. Read more about him on the About Page. He also publishes how to articles and camera gear reviews at the Photography Tips website.
View some of Bruce’s photos on Instagram and Flickr. Join the tribe of followers on YouTube. Bruce also runs photo workshops and provides 1 on 1 digital photography coaching.
[ad_2]
Source link


