In this digital era, photography has become an integral part of our lives. Whether you’re a professional photographer or an amateur enthusiast, understanding manual mode and Canon camera settings can significantly enhance your photographic skills. This article aims to delve into the intricacies of manual mode, provide essential tips for utilizing Canon camera settings effectively, and offer valuable insights into the world of photography. So grab your Canon camera, unleash your creativity, and let’s embark on this captivating journey!
What is Manual Mode?
Manual mode is a function available in most modern cameras, including Canon models, that allows photographers to have complete control over their camera settings. Unlike automatic or semi-automatic modes, where the camera makes decisions on exposure, focus, and other parameters, manual mode empowers photographers to take full charge and make informed choices based on their artistic vision.
When shooting in manual mode, you have control over three fundamental aspects: aperture, shutter speed, and ISO. Understanding how these elements work together is crucial for capturing stunning photographs in diverse lighting conditions and achieving desired effects.
Aperture: Controlling Depth of Field
Aperture refers to the size of the lens opening that determines how much light enters the camera. It is measured in f-stops, with smaller numbers representing larger openings and vice versa. Adjusting the aperture affects the depth of field in your images – the range of distance that appears sharp and in focus.
For example, when photographing a portrait, setting a wide aperture (small f-number like f/1.8) creates a shallow depth of field, resulting in a beautifully blurred background while keeping the subject in sharp focus. On the other hand, using a narrow aperture (larger f-number like f/16) expands the depth of field, making both the foreground and background appear sharper.
Shutter Speed: Capturing Motion
Shutter speed determines how long the camera’s shutter remains open, exposing the camera sensor to light. It is measured in seconds or fractions of a second. Faster shutter speeds freeze motion, while slower speeds create motion blur.
Let’s say you’re capturing a sporting event. Utilizing a fast shutter speed (1/1000 sec) will freeze the action, allowing you to capture sharp images of athletes in mid-air or during high-speed movements. Conversely, using a slow shutter speed (1/10 sec) can create artistic effects like light trails from moving vehicles or smooth waterfalls.
ISO: Sensitivity to Light
ISO measures the camera sensor’s sensitivity to light. A low ISO value (e.g., ISO 100) is ideal for bright lighting conditions, while a higher ISO (such as ISO 1600) is suitable for low-light situations. However, increasing the ISO also introduces noise or graininess in the image.
For instance, when shooting indoors or during sunset, raising the ISO sensitizes the sensor to capture more light, reducing the risk of underexposure. Remember to strike a balance between ISO and other settings to maintain image quality while minimizing noise.
Canon Camera Settings: Unleashing the Power of Your Camera
Now that we have explored the fundamentals of manual mode, let’s dive into specific Canon camera settings that can elevate your photography skills. Understanding and utilizing these settings effectively can unlock a world of creative possibilities.
RAW vs. JPEG: Preserving Image Quality
When shooting with a Canon camera, you have the option to save your images in either RAW or JPEG format. While both formats have their advantages, shooting in RAW provides greater flexibility during post-processing.
RAW files contain the unprocessed data captured by the camera’s sensor, preserving maximum detail and offering enhanced control over aspects like exposure, white balance, and color correction. On the other hand, JPEG files are compressed and processed in-camera, resulting in smaller file sizes but with limited editing capabilities.
For professional photographers or those seeking maximum control over their images, shooting in RAW is highly recommended. However, if you’re capturing images for immediate sharing or don’t plan on extensive post-processing, JPEG can be a convenient choice.
Auto-Focus Modes: Precision in Focusing
Canon cameras offer various auto-focus (AF) modes to ensure precise focusing based on your subject and shooting conditions. Understanding these modes will help you capture sharp, well-focused images effortlessly.
- One-Shot AF: This mode is suitable for static subjects. When half-pressing the shutter button, the camera focuses on the subject and locks the focus until the image is captured.
- AI Servo AF: Designed for moving subjects, this mode continually adjusts the focus as long as the shutter button is half-pressed. It tracks the subject’s movement, allowing you to capture action shots with accuracy.
- AI Focus AF: This mode automatically switches between One-Shot AF and AI Servo AF depending on whether the subject is stationaryor in motion. It’s a versatile option that provides flexibility in various shooting scenarios.
White Balance: Accurate Color Representation
White balance ensures that the colors in your photographs appear natural and true to life, regardless of the lighting conditions. Canon cameras offer several white balance presets, including daylight, cloudy, tungsten, fluorescent, and custom settings.
For example, when shooting under artificial indoor lighting, selecting the appropriate white balance preset or manually adjusting the color temperature ensures that the image doesn’t appear too warm (yellowish) or cool (bluish). Understanding white balance and experimenting with different settings can significantly improve the overall color accuracy of your photos.
Metering Modes: Achieving Proper Exposure
Metering modes determine how the camera measures light to achieve proper exposure. Canon cameras typically provide three metering options: evaluative, spot, and center-weighted average.
- Evaluative Metering: This mode analyzes the entire scene and calculates the exposure based on various factors such as subject brightness, contrast, and distance. It’s a versatile metering mode suitable for most situations.
- Spot Metering: In this mode, the camera meters only a small area (typically around 3-5% of the frame) at the center. It’s useful when you want to prioritize the exposure of a specific part of the scene, like a person’s face.
- Center-Weighted Average Metering: This mode gives priority to the center of the frame while considering the entire scene. It’s beneficial when the subject is off-center but still requires balanced exposure.
Understanding the metering modes enables you to accurately expose your images, ensuring that neither the highlights nor the shadows are excessively overexposed or underexposed.
How to Master Manual Mode and Canon Camera Settings

Now that we’ve covered the essential concepts and Canon camera settings, let’s explore a step-by-step guide to mastering manual mode and optimizing your Canon camera for stunning results.
Step 1: Familiarize Yourself with Your Canon Camera
Begin by thoroughly reading the camera’s user manual to understand its specific features, settings, and controls. Different Canon models may have slight variations in their menu systems and button layouts, so becoming familiar with your specific camera model is crucial.
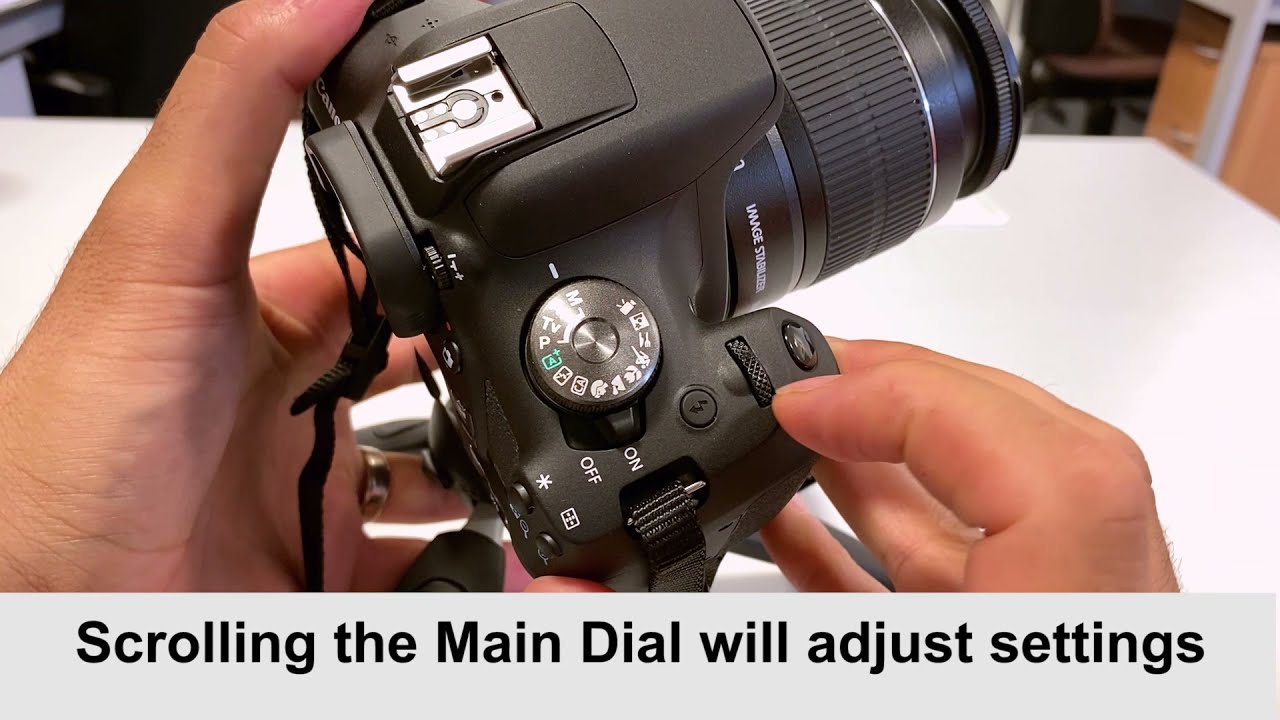
Step 2: Switch to Manual Mode
Once you’re comfortable with your camera, switch it to manual mode. This allows you to take control of your photography and experiment with different settings to achieve desired effects.
Step 3: Understand the Exposure Triangle
The exposure triangle comprises aperture, shutter speed, and ISO—three critical elements that determine the exposure and artistic outcome of your photos. Spend time understanding how changes in each parameter affect the final image.
Step 4: Experiment with Aperture
Start experimenting with aperture by adjusting the f-stop values and observing the changes in depth of field. Capture images with different aperture settings to understand the impact on background blur and sharpness.
Step 5: Master Shutter Speed
Explore the creative possibilities of shutter speed by capturing motion using fast or slow speeds. Experiment with freezing action or creating intentional motion blur to convey a sense of movement in your photographs.
Step 6: Fine-tune ISO Sensitivity
Experiment with different ISO settings to find the optimal balance between capturing sufficient light and minimizing noise. Take test shots in various lighting conditions to evaluate the image quality at different ISO values.
Step 7: Combine and Refine Settings
As you become more proficient in using aperture, shutter speed, and ISO, work on combining these settings to achieve the desired exposure and artistic effects. Practice shooting in different lighting scenarios to gauge the effectiveness of your chosen settings.
Step 8: Post-Processing and Editing
Once you’ve captured your images in RAW format, utilize post-processing software like Adobe Lightroom or Canon’s Digital Photo Professional to fine-tune your photographs further. Adjust exposure, contrast, white balance, and other parameters to bring out the best in your images.
Pros and Cons of Manual Mode and Canon Camera Settings

While manual mode and utilizing Canon camera settings offer numerous advantages for photographers, it’s important to consider both the pros and cons before fully embracing this approach.
Pros:
- Full Creative Control: Manual mode empowers photographers to make deliberate decisions about exposure, focus, and artistic effects, giving them complete control over their images.
- Optimal Exposure: By manually adjusting aperture, shutter speed, and ISO, photographers can achieve precise exposure that suits their creative vision, even in challenging lighting conditions.
- Flexibility in Post-Processing: Shooting in RAW format allows for extensive post-processing capabilities, enabling photographers to correct or enhance their images with greater control and detail.
Cons:
- Steep Learning Curve: Mastering manual mode and understanding Canon camera settings requires time, practice, and a deep understanding of the technical aspects of photography.
- Potential for Missed Shots: In fast-paced situations where moments unfold quickly, manually adjusting settingscan lead to missed opportunities or capturing images with incorrect exposure settings.
- Requires Technical Knowledge: To fully utilize manual mode and Canon camera settings, photographers need a solid understanding of concepts like aperture, shutter speed, ISO, and their interplay. This can be overwhelming for beginners.
Alternatives to Manual Mode

While manual mode provides maximum control, there are alternative shooting modes that cater to different photography styles or preferences. Let’s explore two common alternatives:
- Aperture Priority (Av/A): In this mode, you have control over the aperture setting, while the camera automatically adjusts the shutter speed to achieve proper exposure. It’s useful when depth of field is a priority, such as in portrait or landscape photography.
- Shutter Priority (Tv/S): Shutter priority mode allows you to select the desired shutter speed, while the camera adjusts the aperture accordingly. This mode is beneficial when capturing fast-moving subjects or situations that require deliberate motion blur effects.
These modes offer a balance between creative control and automation, making them suitable alternatives for photographers who may not want to dive into manual mode initially.
Comparing Canon Camera Models
Canon boasts an extensive lineup of cameras catering to various skill levels and budgets. Let’s compare two popular models to understand their differences:
- Canon EOS 5D Mark IV: Positioned as a professional-grade DSLR, the EOS 5D Mark IV features a full-frame sensor, high-resolution image quality, advanced autofocus system, and robust video capabilities. It’s well-suited for professional photographers seeking superior performance and versatility.
- Canon EOS Rebel T7i (EOS 800D): As an entry-level DSLR, the Rebel T7i offers an affordable option for beginners or enthusiasts. It features a smaller APS-C sensor, intuitive controls, and built-in guidance for learning photography techniques. This model strikes a balance between ease of use and image quality.
When choosing a Canon camera, consider factors such as your photography goals, budget, desired features, and future upgrade potential. Comparing specifications and reading reviews can help you make an informed decision.
Tips for Perfecting Your Photography Skills

To elevate your photography skills and capture breathtaking images, here are a few additional tips:
- Explore Different Perspectives: Don’t be afraid to experiment with unique angles and viewpoints. Shoot from high above or get down low to create visually interesting compositions.
- Master Composition Techniques: Learn about the rule of thirds, leading lines, symmetry, and other composition principles to enhance the visual impact of your photographs.
- Study and Analyze Existing Photos: Study the work of renowned photographers to gain inspiration and insights into their techniques. Analyze their framing, use of light, and storytelling to refine your own style.
- Practice Patience: Great shots often require patience. Wait for the perfect moment, observe your surroundings, and be ready to capture that magical scene or decisive moment.
- Experiment with Different Lighting Conditions: Challenge yourself by shooting in various lighting scenarios, including golden hour, night photography, or indoor settings. Each scenario offers unique opportunities and challenges.
The Best Canon Camera Settings for Stunning Results
While there is no definitive “best” set of Canon camera settings applicable to every situation, here are some recommendations to achieve stunning results:
- Portrait Photography: Use a wide aperture (small f-number) to create a shallow depth of field and beautifully blurred background. Opt for a focal length between 50mm and 85mm for flattering portraits.
- Landscape Photography: Choose a narrow aperture (larger f-number) to maximize depth of field and ensure sharpness throughout the scene. Utilize a wide-angle lens for capturing expansive landscapes.
- Action Photography: Set a fast shutter speed to freeze motion and capture sharp, action-packed images. Combine this with AI Servo AF mode for continuous focusing on moving subjects.
- Low-Light Photography: Increase the ISO sensitivity to capture more light, but be cautious of excessive noise. Utilize wider aperture settings and consider using a tripod or image stabilization techniques to mitigate camera shake.
Remember, these recommendations serve as starting points, and experimentation is key to finding your own style and preferences.
Conclusion

Mastering manual mode and understanding Canon camera settings are essential steps toward becoming a skilled photographer. By grasping the concepts of aperture, shutter speed, ISO, and exploring various camera functions, you can unlock your creative potential and capture stunning images in diverse shooting conditions. With practice, patience, and a willingness to learn, you’ll embark on an exciting journey of photography, capturing moments that evoke emotions and tell stories through your lens.
FAQs
Q1: Can I shoot in manual mode with any Canon camera?
Yes, most Canon cameras offer manual mode as a shooting option. However, it’s always recommended to check your camera’s user manual or specifications to ensure it supports manual mode.
Q2: Whatare some recommended Canon camera models for beginners?
For beginners, Canon offers several entry-level DSLR and mirrorless camera models that provide a balance between ease of use and image quality. Some popular options include:
- Canon EOS Rebel T7i (EOS 800D): This camera combines user-friendly controls with excellent image quality, making it an ideal choice for beginners.
- Canon EOS M50: As a mirrorless camera, the EOS M50 offers a compact form factor and advanced features like a vari-angle touchscreen, 4K video recording, and built-in Wi-Fi.
- Canon EOS Rebel SL3 (EOS 250D): This lightweight DSLR features a guided interface, making it particularly suitable for beginners who are learning photography techniques.
These models offer intuitive controls, helpful guidance, and solid image quality, making them great options to kickstart your photography journey.
